Robotic Arm
Introduction
This repository is for the Year Zero Robotic Arm project, included is Arduino sketches, software and documentation.
Sketches
-
Robot_Arm_Manual_Instructions_via_serial, gives you manaul control over each servo individually and is designed to be used via the command line.
-
Robot_Arm_Main, is to be used to automate all planned movements you calculated using the latter sketch.
A Video on how to do download the project to get access the code in one place
Specification
- Specification - link for specification sheet, please read some useful information inside.
Installation
- All you need to do is clone/download (greenButton) and choose download as Zip.
- Right click an extract at current location (Downloads) or navigate to the ardunio sketch folder on the machine and do it there. If you need help ASK!
Construction
-
Wrist and Gripper needs a finer screw driver than the one provided in the pack.
Click the image to be redirected to the construction video on youtube

Make sure you use the right numbered servo motors (numbering on the end of the cable near the connector) in the right joints. And be a bit careful because mounting the servos with the screws causes the plastic to "bloom" a bit and it will never be quite as tight if you have to remove them and put them back in again. Although the plastic pentagons are pre-attached to the servo hub, but I found that some were a few degrees off center, so you just have to adjust your code for that, AGAIN IF YOU NEED HELP ASK!.
Operational Information
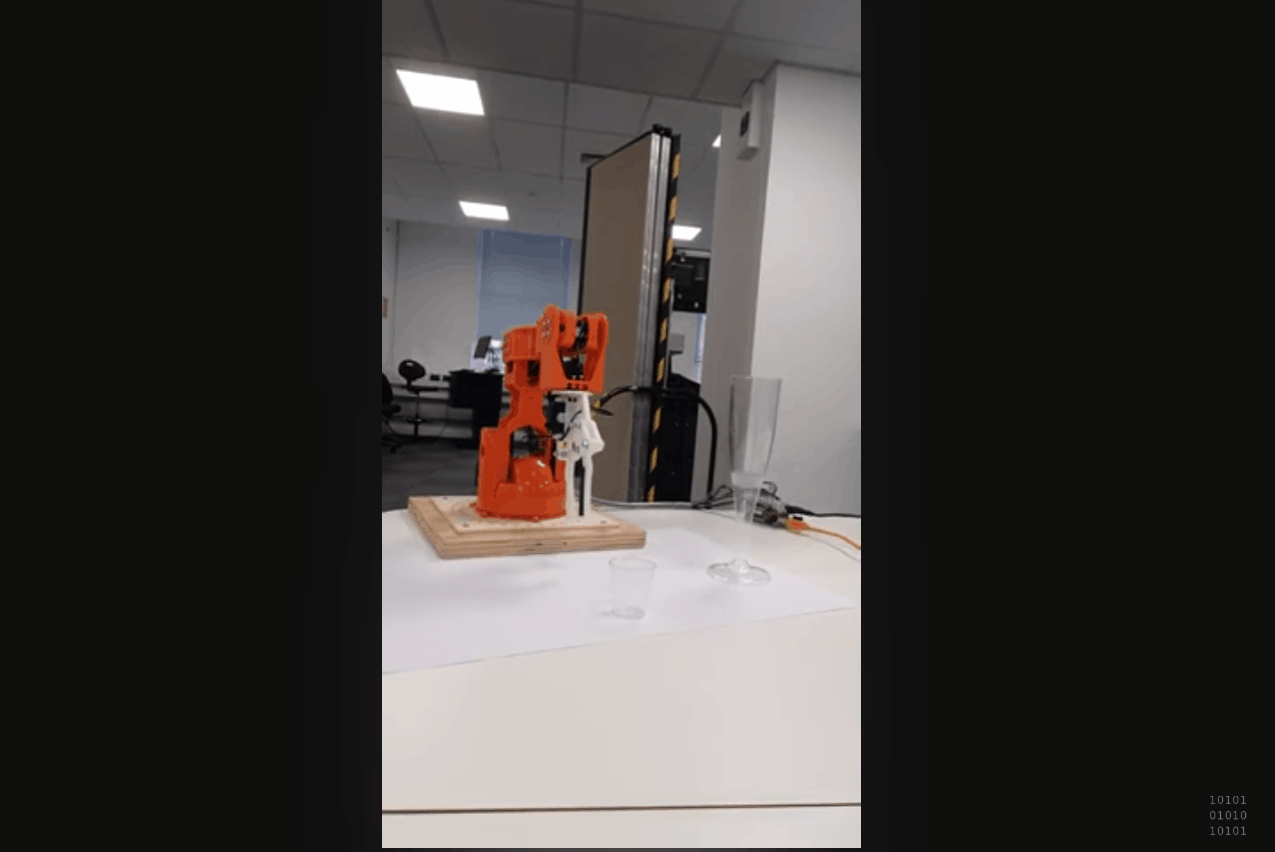
Click the image to be redirected to a quick video of simple pick and place task
Manual Code
To avoid damage to servos serveral key functions are implemented in code, this takes a few seconds be patient after all it is a virtue.
The robotoic arm will only move when an excepted command is inputted:
Allowed values for each servo are as follows:
-
Base = B and ALLOWED values are 0 to 180
-
Shoulder = S and ALLOWED values are 15 to 165
-
Elbow = E and ALLOWED values are 0 to 180
-
Wrist vertical = V and ALLOWED values are 0 to 180
-
Wrist Rotation = R and ALLOWED values are 0 to 180
-
Gripper = G and ALLOWED values are 10 to 73
-
Home Position = HOM which is B90 S90 E180 V180 R90 G10
-
Eg Base to 60 degrees = B60
The robotic arm is ready to receive commands when the led is ON. When the light is OFF when your command is being processed.
Automation code
The automated controls are a sequence of pre-programmed movements, there are two ways to achieve this under the current version [2.1.5]
-
Indepenent motor control:
-
void moveBase(int stepDelay, int vBase); -
void moveShoulder(int stepDelay, int vShoulder); -
void moveElbow(int stepDelay, int vElbow); -
void moveWrist_Ver(int stepDelay, int vWrist_Ver); -
void moveWrist_Rot(int stepDelay, int vWrist_rot); -
void moveGripper(int stepDelay, int vgripper);For example to move the base servo:
moveBase(20,50); // moves the base to 50 degrees
-
-
Indepenent grouped motor control:
-
void roboticArmMovement(int stepDelay, int vBase, int vShoulder, int vElbow, int vWrist_ver, int vWrist_rot, int vgripper)For example to move to the following positions
-
roboticArmMovement(20, 0, 120, 10, 100, 10, 10); //(SD, BA, SH, EL, WV, WR, GR);
ORDER OF OPERATION Robotic Arm moves in this order:
-
base -> shoulder -> elbow -> wrist vertical -> wrist rotation -> gripper
Plan your movements accordingly
-
Acknowledgements
- The sketch has been developed to use key functionality from Braccio Robotic Arm so students do not have to download the libraries.
- Further modification includes Serial I/O
-
This is only to be used with the Braccio Shield V4 becasue the softstart function protects the servo motors and the junctions from damages
-
There has been a request to change some code in the original source code linked above, mix-up of wrist values. So please only use the code that is provided in this repository as the change has been incorporated.