Healthy Recipe App Walkthrough
Introduction
Welcome to this walkthrough guide for building a healthy recipes app using Kotlin and Jetpack Compose in Android Studio.
Download and extract all pictures from the Pictures_Lab_3.zip.
Setting Up the Project
Video @ 0:02 - 1:45
-
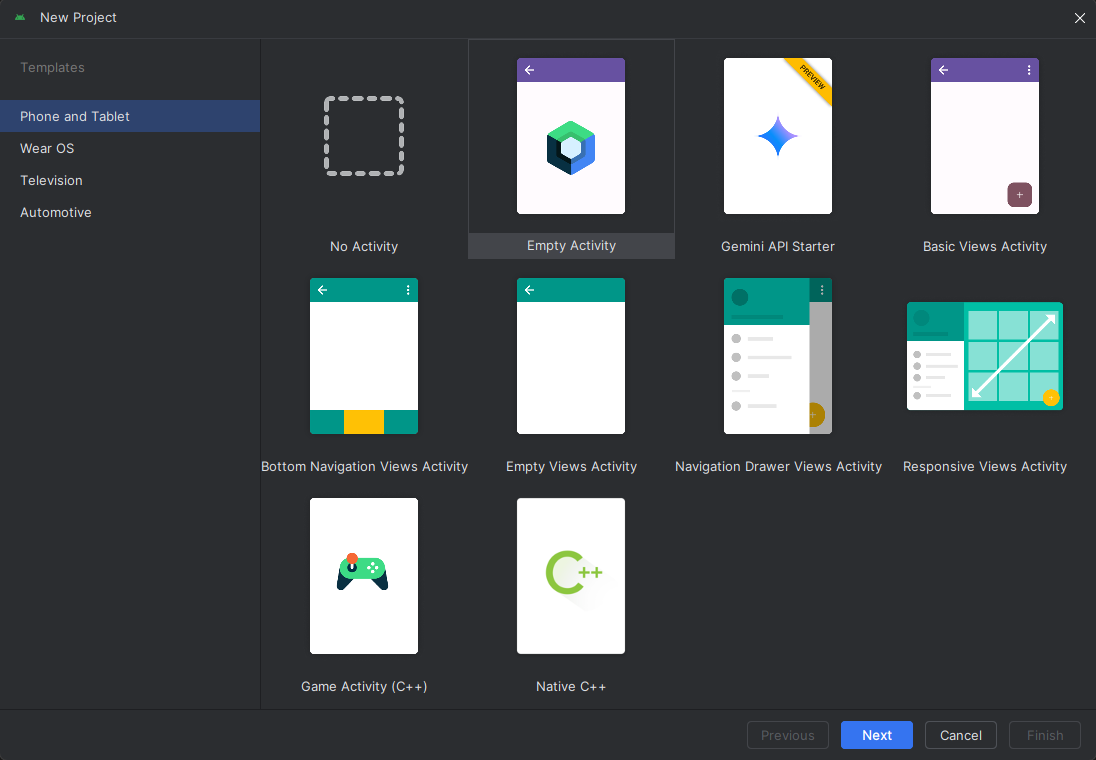
Create a New Project:
-
Select "Empty Activity" and click "Next".
-
Name your application "Healthy Recipes".
-
Ensure the package name is set to
com.uog.healthyrecipes. -
Set the minimum API level to 24.
-
Click "Finish" to create the project.
-
-
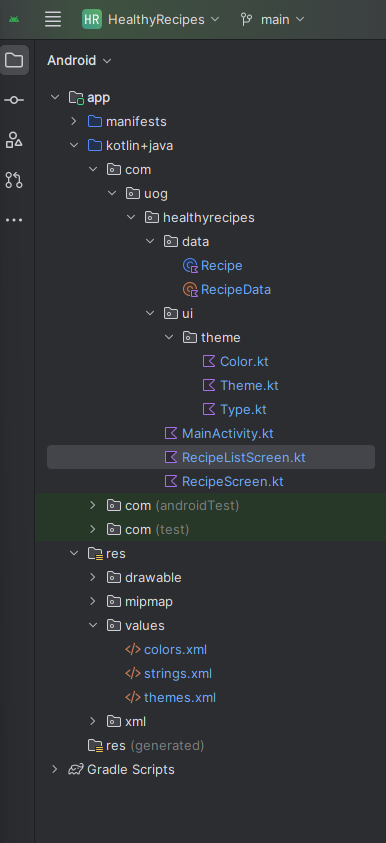
Project Structure:
-
Expand the project structure and locate the
valuesandmipmapdirectories underres. -
Open the preview window to see the default layout.
-
Creating the Data Model
Video @ 2:33 - 10:11
-
Create a Data Package:
- Right-click on the
healthyrecipespackage. - Select "New" > "Package" and name it
data.
- Right-click on the
-
Define the Recipe Data Class:
-
Right-click on the
datapackage, select "New" > "Kotlin Class/File", and name itRecipe. -
Modify the class as follows:
-
Data Classes: In Kotlin, data classes are used to hold data. They automatically provide getter and setter methods,
equals(),hashCode(), andtoString()methods.
-
-
Create the Recipe Data Object:
-
In the
datapackage, create a new Kotlin file namedRecipeData. -
Define the object as follows:
import com.uog.healthyrecipes.R import com.uog.healthyrecipes.data.Recipe object RecipeData { val recipes = listOf( Recipe( id = 1, title = "Spaghetti Carbonara", description = "A classic Italian pasta dish made with eggs, cheese, pancetta...", ingredients = listOf("item 1", "item 2", "item 3..."), imageResId = R.drawable.spaghetti_carbonara ) // Add more recipes here ) } -
Objects: In Kotlin, objects are used to create singleton instances. They can hold state and behavior, and there is only one instance of the object created in the entire application.
-
Setting Up the Main Activity
Video @ 10:11 - 19:44
- Modify the Main Activity Layout:
-
Open
MainActivity.kt. -
Replace the content of the
setContentblock with aScaffoldlayout and atopBar.package com.uog.healthyrecipes ... class MainActivity : ComponentActivity() { @OptIn(ExperimentalMaterial3Api::class) override fun onCreate(savedInstanceState: Bundle?) { super.onCreate(savedInstanceState) enableEdgeToEdge() setContent { HealthyRecipesTheme { val navController = rememberNavController() Scaffold( topBar = { TopAppBar( title = { Text( text = stringResource(id = R.string.app_name) ) } ) }) { paddingValues -> RecipeNavHost(navController = navController, paddingValues) } } } } } -
Scaffold: In Jetpack Compose,
Scaffoldis a component that provides a structure for implementing the basic material design layout. It contains slots for the top bar, bottom bar, floating action button, and a content area. -
NavController: The
NavControlleris the central API for navigating between composables in Jetpack Compose. It handles the navigation stack and the navigation destinations. -
rememberNavController: This function provides an instance of
NavControllerthat is remembered across recompositions, ensuring that the navigation state is retained. -
enableEdgeToEdge: This function enables edge-to-edge display on Android devices, allowing your app to use the entire screen space.
-
Add a preview function:
@Preview(showBackground = true)
@Composable
fun RecipeNavHostPreview() {
    HealthyRecipesTheme {
        val navController = rememberNavController()
        RecipeNavHost(navController = navController, paddingValues = PaddingValues())
    }
}
-
Creating the Navigation Host
Video @ 19:44 - 26:02
- Define the Navigation Host:
-
Define the composable function as follows in
MainActivity.kt: -
NavHost():
NavHostis a container composable that hosts the navigation graph. It connects the NavController with the navigation graph, allowing navigation betweencomposabledestinations. -
composable(): This function is used to define a navigation destination in the
NavHost. Each composable represents a screen in the app. -
Modifier.padding(): This
modifieradds padding around thecomposable. In this case, it applies the padding values passed from theScaffold.
-
Building the Recipe List Screen
Video @ 26:02 - 26:42
- Create the Recipe List Screen:
-
Create a new Kotlin file named
RecipeListScreen.kt. -
Define the composable function as follows:
package com.uog.healthyrecipes ... @Composable fun RecipeListScreen(navController: NavHostController) { Column( modifier = Modifier .fillMaxSize() .padding(16.dp), horizontalAlignment = Alignment.CenterHorizontally ) { Text( text = "Choose a Recipe", style = MaterialTheme.typography.headlineSmall ) Spacer(modifier = Modifier.height(20.dp)) RecipeData.recipes.forEach { recipe -> RecipeItem(recipe = recipe, onClick = { navController.navigate("recipe/${recipe.id}") }) Spacer(modifier = Modifier.height(10.dp)) } } } -
Column:
Columnis a layout composable that places its children in a vertical sequence. It's similar to a vertical LinearLayout in traditional Android development. -
Modifier: Modifiers in Jetpack Compose are used to decorate or augment composables. They can be used to adjust the layout, add padding, set click actions, and more.
-
Text: The
Textcomposable is used to display text on the screen. It can be styled using various properties. -
Spacer:
Spaceris a composable used to create space between other composables. It can be given specific height or width to create padding. -
MaterialTheme:
MaterialThemeprovides theming capabilities based on Material Design principles. It includes typography, shapes, and colors that can be applied to composables. -
Add a preview function:
@Preview(showBackground = true)
@Composable
fun PreviewRecipeListScreen(){
    HealthyRecipesTheme {
        val navController = rememberNavController()
        RecipeListScreen(navController = navController)
    }
}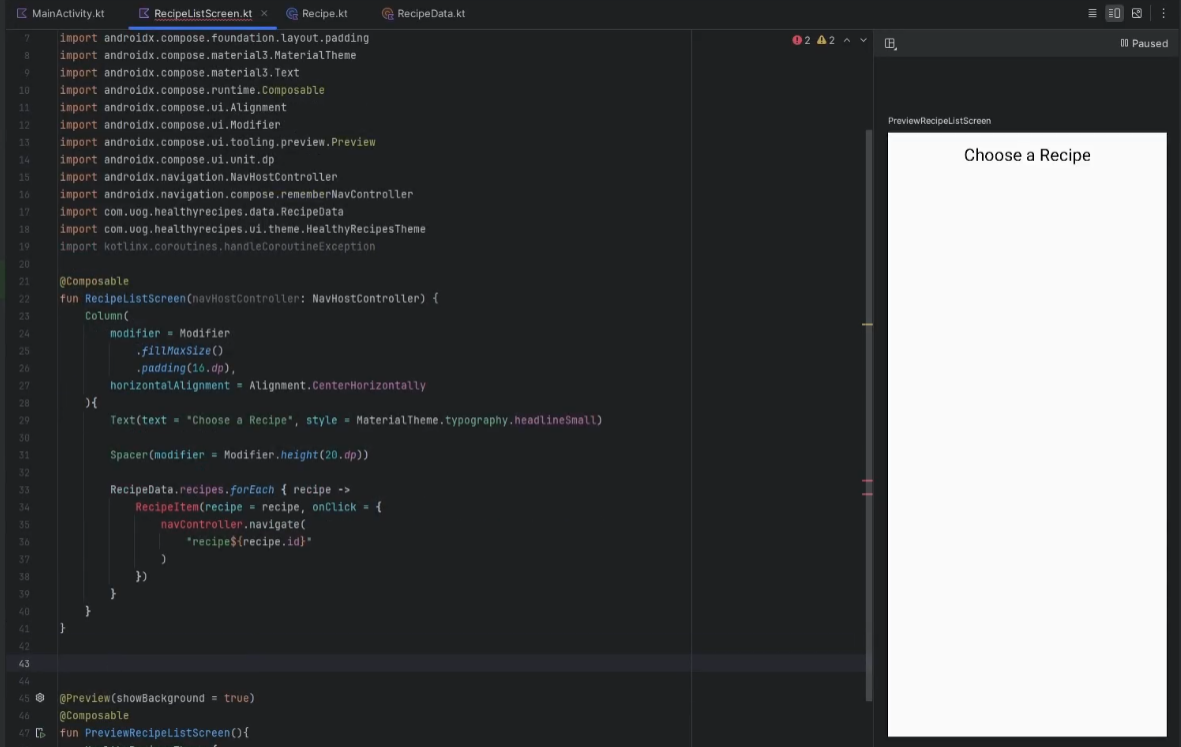
-
Building the Recipe Item Component
Video @ 26:42 - 35:40
- Create the Recipe Item Component:
-
Conitinuing in the
RecipeListScreen.ktfile, add the following composable function:@Composable fun RecipeItem(recipe: Recipe, onClick: () -> Unit) { Card( modifier = Modifier .fillMaxWidth() .padding(8.dp) .clickable(onClick = onClick), shape = RoundedCornerShape(8.dp) ) { Row(modifier = Modifier.padding(8.dp)) { Image( painter = painterResource(id = recipe.imageResId), contentDescription = recipe.title, modifier = Modifier.size(70.dp).clip(RoundedCornerShape(8.dp)), contentScale = ContentScale.Crop ) Spacer(modifier = Modifier.width(16.dp)) Column { Text(text = recipe.title, style = MaterialTheme.typography.headlineSmall) Text(text = recipe.description, style = MaterialTheme.typography.bodySmall) } } } } -
Card:
Cardis a composable that displays its children with a customizable background, elevation, and rounded corners. It is used to create a consistent look for elements like cards. -
Row:
Rowis a layout composable that places its children in a horizontal sequence. It's similar to a horizontal LinearLayout in traditional Android development. -
Image: The
Imagecomposable is used to display images. It can be loaded from resources or URLs and can be styled with modifiers. -
painterResource: This function loads an image resource into an
Imagecomposable.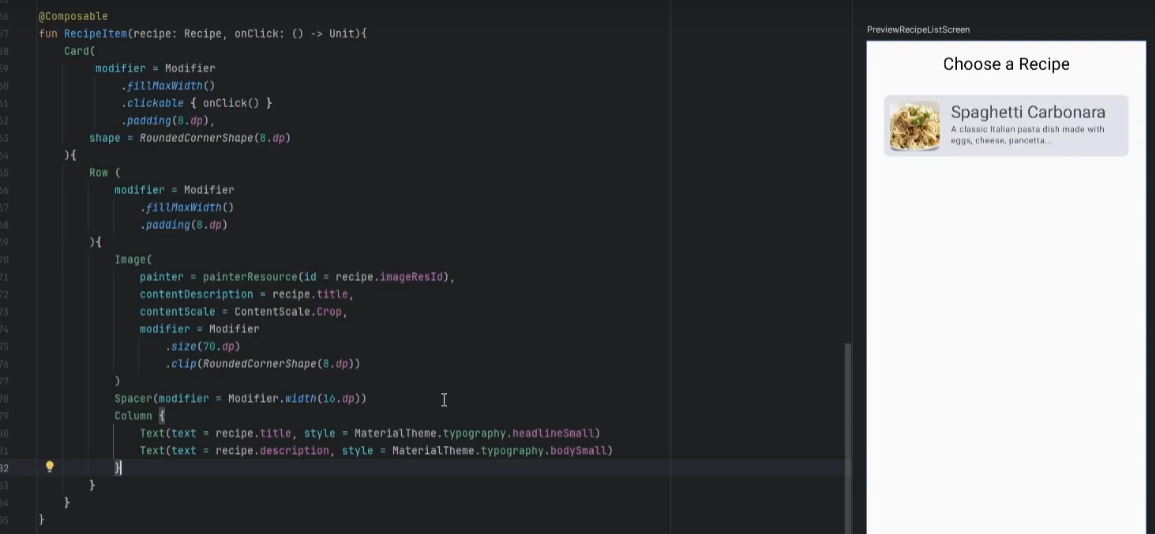
-
Updating the Recipe Nav Host 1
Video @ 35:40 - 38.00
-
Go back to the MainActivity.kt and navigate the function
RecipeNavHost(...), we are going add acomposable()for ourrecipeListScreen()to for MainActivity.kt -
We are going to add this line in the body of the
NavHost(){...}:composable("recipe_list){ RecipeListScreen(navController = navController)}@Composable fun RecipeNavHost(navController : NavHostController, paddingValues: PaddingValues) { NavHost( navController = navController, startDestination = stringResource(id = R.string.recipe_list), Modifier.padding(paddingValues)) { composable("recipe_list"){ RecipeListScreen(navController = navController)} // TO DO show each recipe onclick. } } -
The build preview should update and you'll see the same preview as in
RecipeListScreen.kt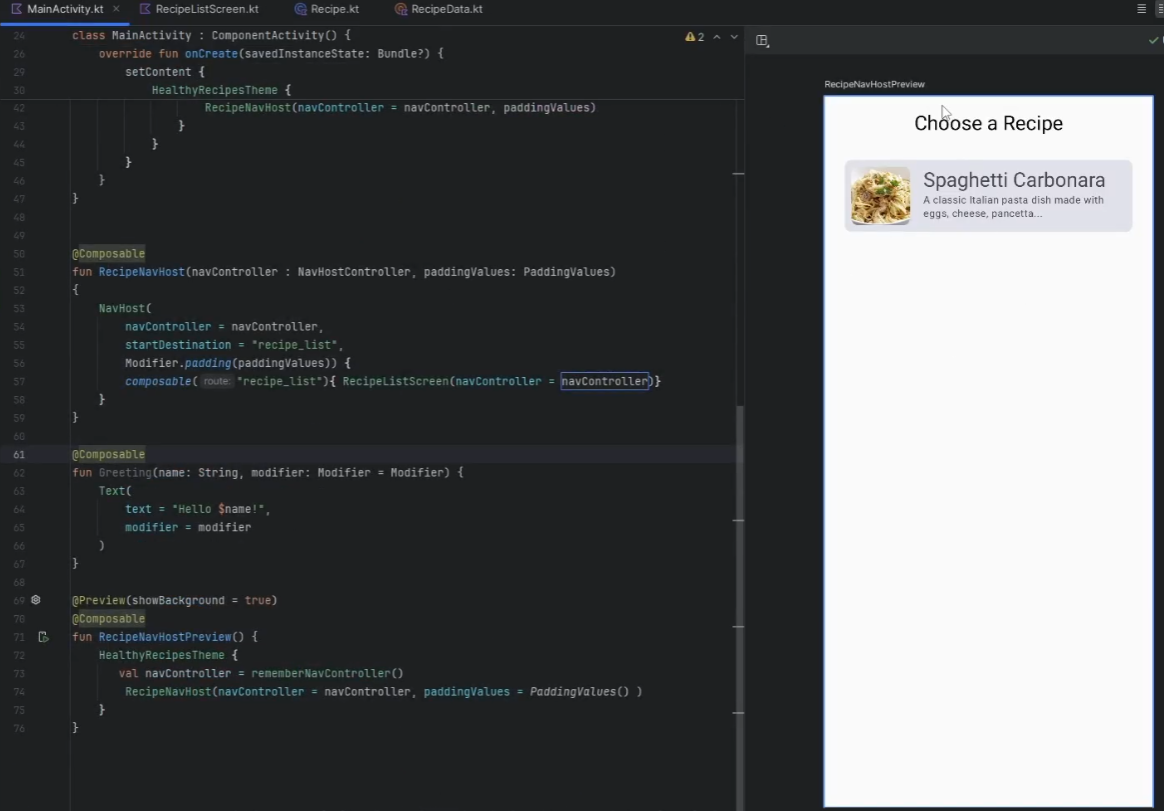
Building the Recipe Screen
Video @ 38.00 - 47.05
-
Create the Recipe Screen:
-
Create a new Kotlin file named
RecipeScreen.kt. -
Define the composable function as follows:
package com.uog.healthyrecipes ... @Composable fun RecipeScreen(recipe: Recipe) { Column( modifier = Modifier .fillMaxSize() .padding(16.dp) ) { Image( painter = painterResource(id = recipe.imageResId), contentDescription = recipe.title, modifier = Modifier .height(200.dp) .fillMaxWidth() .clip(RoundedCornerShape(8.dp)), contentScale = ContentScale.Crop ) Spacer(modifier = Modifier.height(16.dp)) Text(text = recipe.title, style = MaterialTheme.typography.headlineSmall) Spacer(modifier = Modifier.height(10.dp)) Text(text = recipe.description, style = MaterialTheme.typography.bodySmall) Spacer(modifier = Modifier.height(16.dp)) Text(text = "Ingredients", style = MaterialTheme.typography.headlineSmall) Spacer(modifier = Modifier.height(8.dp)) recipe.ingredients.forEach { ingredient -> Text(text = "• $ingredient", style = MaterialTheme.typography.bodySmall) } } } -
Image: The Image composable is used to display images. It can be loaded from resources or URLs and can be styled with modifiers.
-
Spacer: Spacer is a composable used to create space between other composables. It can be given specific height or width to create padding.
-
Column: Column is a layout composable that places its children in a vertical sequence. It's similar to a vertical LinearLayout in traditional Android development.
-
Modifier: Modifiers in Jetpack Compose are used to decorate or augment composables. They can be used to adjust the layout, add padding, set click actions, and more.
-
MaterialTheme: MaterialTheme provides theming capabilities based on Material Design principles. It includes typography, shapes, and colors that can be applied to composables.
-
-
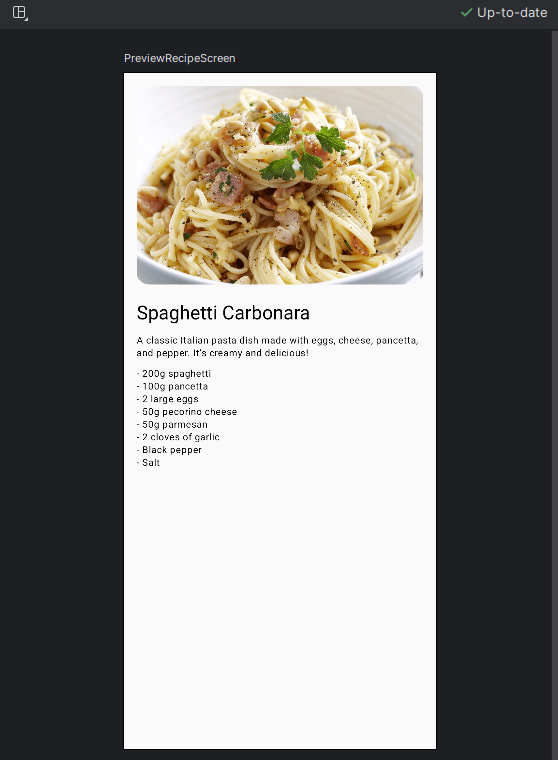
Remember we should add a preview to see what we are doing:
@Preview(showBackground = true)
@Composable
fun PreviewRecipeScreen(){
    HealthyRecipesTheme {
        RecipeScreen(recipe = RecipeData.recipes[0])
    }
}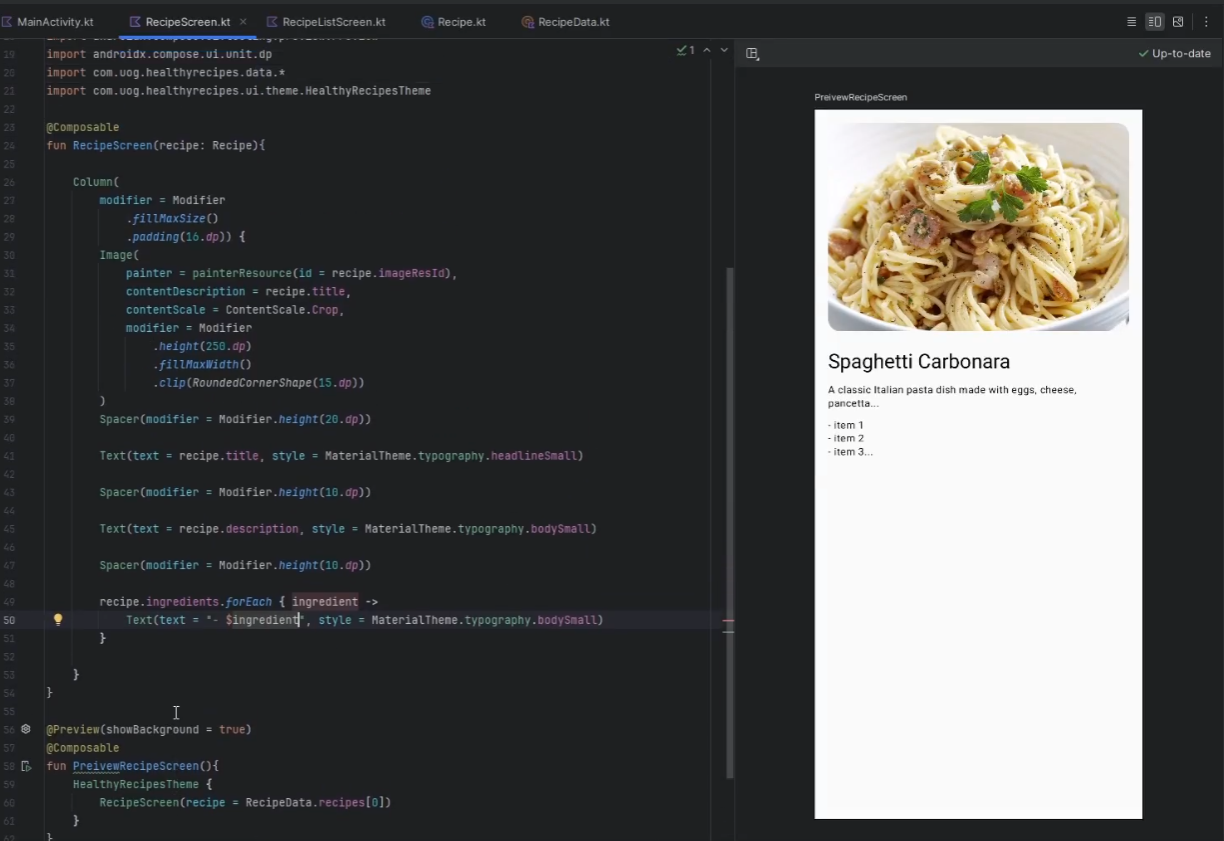
Updating the Recipe Nav Host 2
Video @ 47.05 - 49.45
-
Go back to the MainActivity.kt and navigate the function
RecipeNavHost(...), we are going add acomposable()for ourrecipeListScreen()to for MainActivity.kt -
We are going to add this line in the body of the
NavHost(){...}:composable("recipe_1"){ RecipeScreen(RecipeData.recipes[0])}@Composable fun RecipeNavHost(navController : NavHostController, paddingValues: PaddingValues) { NavHost( navController = navController, startDestination = stringResource(id = R.string.recipe_list), Modifier.padding(paddingValues)) { composable("recipe_list"){ RecipeListScreen(navController = navController)} composable("recipe_1"){ RecipeScreen(RecipeData.recipes[0])} } } -
If you run the app in the emulator, you will see the following:
-
This is because we did not reference the correct format of a route, go back to RecipeListScreen.kt, and you will see the block of code:
RecipeData.recipes.forEach { recipe -> RecipeItem(recipe = recipe, onClick = { navController.navigate( "recipe${recipe.id}" ) })- the line
"recipe${recipe.id}"is a different format that one we have providecomposable("Recipe_1",...), update the line:
RecipeData.recipes.forEach { recipe ->
RecipeItem(recipe = recipe, onClick = {
    navController.navigate(
        "recipe_${recipe.id}"
    )
})
- the line
Filling out Recipe Data
Video @ 49.50 to 53.28
-
Navigate back to the RecipeData.kt file and lets add some more recipes and fill out the carbonara too.
Recipe(
    1,
    "Spaghetti Carbonara",
    "A classic Italian pasta dish made with eggs, cheese, pancetta, and pepper."+
            " It’s creamy and delicious!",
    listOf(
        "200g spaghetti",
        "100g pancetta",
        "2 large eggs",
        "50g pecorino cheese",
        "50g parmesan",
        "2 cloves of garlic",
        "Black pepper",
        "Salt"),
    R.mipmap.spaghetti_carbonara ),

Recipe(
    2,
    "Chicken Tikka Masala",
    "A popular Indian dish with grilled chunks of chicken enveloped in a creamy,"+
            " spicy tomato sauce.",
    listOf("4 chicken breasts",
        "1 cup yogurt",
        "2 tbsp lemon juice",
        "2 tsp ground cumin",
        "2 tsp ground coriander",
        "1 tsp turmeric",
        "1 tsp paprika",
        "1 tsp chili powder",
        "2 tbsp vegetable oil",
        "1 onion",
        "2 cloves of garlic",
        "1 tsp ginger",
        "1 can of tomatoes",
        "1 cup cream",
        "Fresh coriander"),
    R.mipmap.chicken_tikka_masala),

Recipe(
    3,
    "Avocado Toast",
    "A simple and healthy breakfast option with mashed avocado spread on toasted"+
            " bread, often topped with various ingredients.",
    listOf(
        "2 slices of bread",
        "1 ripe avocado",
        "Salt", "Pepper",
        "Lemon juice",
        "Chili flakes (optional)",
        "Cherry tomatoes (optional)",
        "Feta cheese (optional)"),
    R.mipmap.avocado_toast
)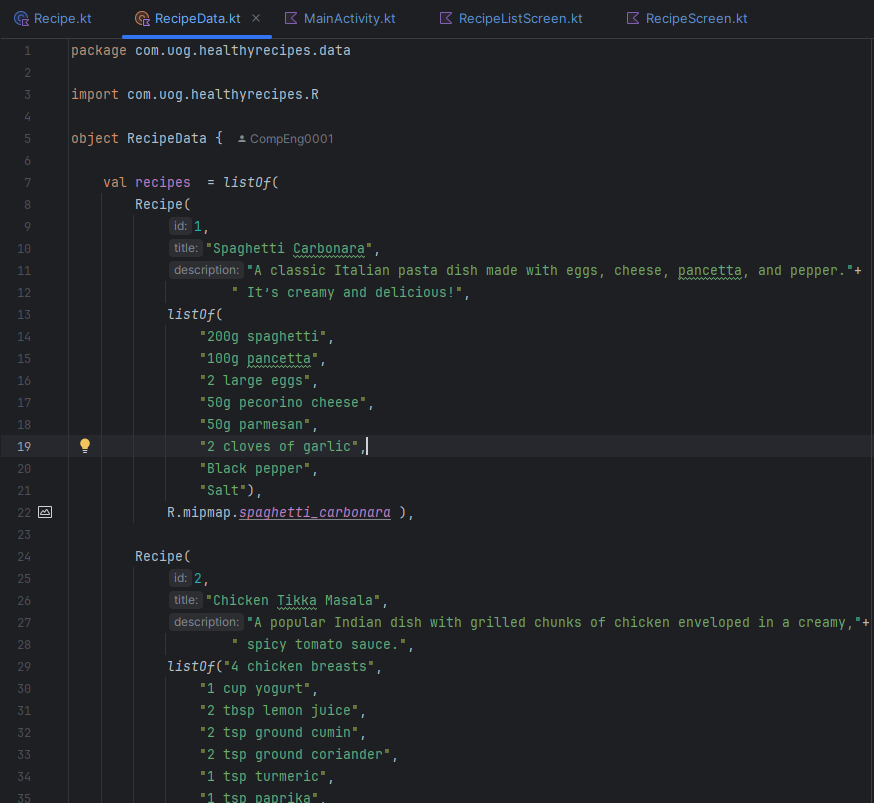
-
Go back to the MainActivity.kt and navigate the function
RecipeNavHost(...), we are going add acomposable()for ourrecipeListScreen()to for MainActivity.kt -
We are going to add this line in the body of the
NavHost(){...}:composable("recipe_1"){ RecipeScreen(RecipeData.recipes[0])}@Composable fun RecipeNavHost(navController : NavHostController, paddingValues: PaddingValues) { NavHost( navController = navController, startDestination = stringResource(id = R.string.recipe_list), Modifier.padding(paddingValues)) { composable("recipe_list"){ RecipeListScreen(navController = navController)} composable("recipe_1"){ RecipeScreen(RecipeData.recipes[0])} composable("recipe_2"){ RecipeScreen(RecipeData.recipes[1])} composable("recipe_3"){ RecipeScreen(RecipeData.recipes[2])} } } -
Build and run to see the "finished" application...
Conclusion
Congratulations! You have successfully built a Healthy Recipe App using Kotlin and Jetpack Compose. You can now extend this app by adding more recipes, improving the UI, and using external data sources and much more.
Extra's
You can use the lab above as a guide on building the following apps:
You can find royalty-freee images here: https://www.freeimages.com/
1. Youth Hostel App
| Application Title | Youth Hostel App |
|---|---|
| Purpose | In a youth hostel reservation app, a hostel is selected and an address and other information is displayed |
| Algorithm 1: | The opening screen displays the name of a hostel, an image (provided in the Pictures folder at top of workbook), and a Button control. Research a real name of a hostel and address and cost range to display in your own customized app (do not use the one in the figure below!) |
| Algorithm 2: | When the user selects a hostel, an address and a cost range are displayed in a second screen. |
2. Segway Rental App
| Application Title | Segway Rental App |
|---|---|
| Purpose | In this app, a Segway tour is selected and a Segway image is displayed with rental information |
| Algorithm 1: | The opening screen displays the title of the app, a description and a Button control. |
| Algorithm 2: | When the user chooses to rent a Segway, an image (provided in the Pictures folder at top of workbook) displaying the Segway and tour price is shown. |
3. Business Card App
| Application Title | Business Card App |
|---|---|
| Purpose | This app provides your business card information with your own picture. Create two screens for the business card app. You use the app to select the name of a business contact, and then display detailed business card information |
| Algorithm 1: | The opening screen displays the name of the contact, your picture converted to a .png file, and a Button control. Create your own layout. |
| Algorithm 2: | The second screen displays your business card information. Create your own layout. |